In today’s digital world, capturing screenshots programmatically can be incredibly useful for creating tutorials, monitoring applications, or automating tasks. Python, with its vast array of libraries, offers a simple solution for this through the pyscreenshot library. In this blog post, we’ll explore how to use pyscreenshot to take screenshots in Python effortlessly.
Table of Contents
Why pyscreenshot?
pyscreenshot is a lightweight library that allows you to capture screenshots using multiple backends like Pillow, PyQt, and wxPython. This flexibility makes it a reliable choice across different operating systems. Whether you need to capture the entire screen or a specific region, pyscreen has got you covered.
Installing pyscreenshot
Before diving into code, you’ll need to install pyscreenshot. You can do this easily using pip:
pip install pyscreenshotAdditionally, depending on your operating system, you might need to install some system dependencies. For example, on Linux, you may need scrot:
sudo apt-get install scrotCapturing the Entire Screen
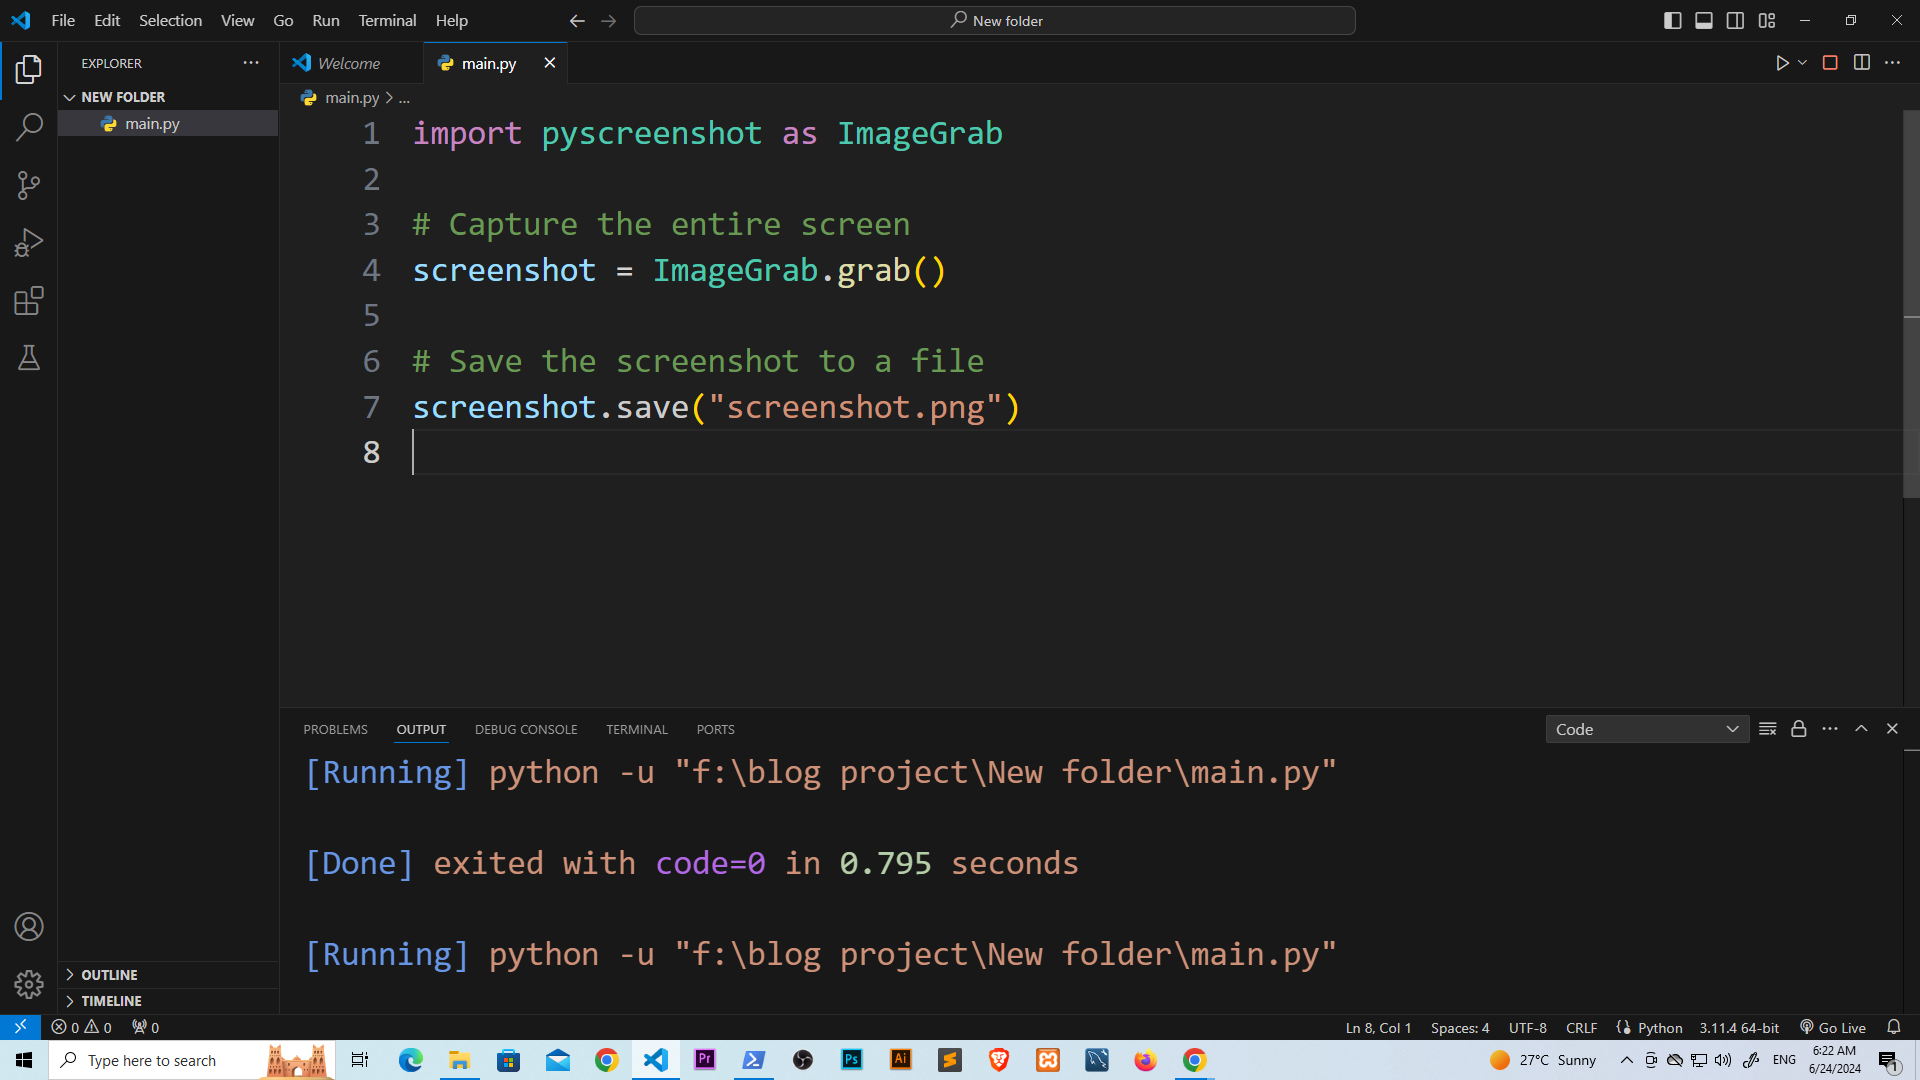
Let’s start with a simple example of capturing the entire screen:
import pyscreenshot as ImageGrab

# Capture the entire screen
screenshot = ImageGrab.grab()

# Save the screenshot to a file
screenshot.save("screenshot.png")
In this snippet, we use the grab function to capture the screen and then save the image as screenshot.png.

Capturing a Region of the Screen
Sometimes, you might only need a specific part of the screen. pyscreen allows you to define a bounding box to capture a particular region:
import pyscreenshot as ImageGrab

# Define the bounding box (left, top, right, bottom)
bbox = (100, 100, 800, 600)

# Capture the region
region_screenshot = ImageGrab.grab(bbox=bbox)

# Save the screenshot to a file
region_screenshot.save("region_screenshot.png")
Here, the bbox variable specifies the coordinates of the region to capture. This is particularly useful for focusing on specific application windows or areas of interest.

Displaying the Screenshot
In addition to saving the screenshot, you might want to display it directly within your application. This can be done using the show method:
import pyscreenshot as ImageGrab

# Capture the entire screen
screenshot = ImageGrab.grab()

# Show the screenshot
screenshot.show()
This method opens the captured image using the default image viewer on your system.
Troubleshooting and Dependencies
pyscreen supports multiple backends. If you run into issues, make sure you have the necessary dependencies installed. For instance, pyscreen often works well with Pillow, which you can install using:
pip install pillowOn some systems, other backends like PyQt or wxPython might be required for better compatibility or additional features.
Automating Screenshots
Automating the process of taking screenshots can be useful for creating time-lapse videos, monitoring changes on your screen, or capturing errors in applications. Here’s an example of how you can automate the screenshot process using a loop and time delays:
import pyscreenshot as ImageGrab
import time

# Define the interval between screenshots (in seconds)
interval = 10

# Define the number of screenshots to capture
num_screenshots = 5

for i in range(num_screenshots):
    # Capture the entire screen
    screenshot = ImageGrab.grab()

    # Save the screenshot to a file
    screenshot.save(f"screenshot_{i}.png")

    # Wait for the specified interval
    time.sleep(interval)
In this script, the program captures a screenshot every 10 seconds and saves it with a unique filename.
Integrating with GUI Applications
If you’re developing a GUI application, integrating screenshot functionality can enhance user interaction. For example, you might want to provide users with a button to capture the screen or a region of it. Below is an example using tkinter to create a simple GUI with a button to capture a screenshot:
import pyscreenshot as ImageGrab
import tkinter as tk
from tkinter import messagebox

def take_screenshot():
    # Capture the entire screen
    screenshot = ImageGrab.grab()

    # Save the screenshot to a file
    screenshot.save("screenshot.png")

    # Notify the user
    messagebox.showinfo("Screenshot", "Screenshot saved as screenshot.png")

# Create the main window
root = tk.Tk()
root.title("Screenshot Tool")

# Create a button to take a screenshot
screenshot_button = tk.Button(root, text="Take Screenshot", command=take_screenshot)
screenshot_button.pack(pady=20)

# Run the application
root.mainloop()
In this example, when the user clicks the “Take Screenshot” button, the application captures the screen and saves the screenshot as screenshot.png.
Conclusion
Taking screenshots in Python is straightforward with the pyscreen library. Whether you need to capture the entire screen or just a portion of it, pyscreen provides a simple and flexible solution. By following the steps outlined in this blog post, you can integrate screenshot functionality into your Python projects with ease. Happy codin
Mastering Python: Unleashing the Power of Lambda Functions